Staved Box
A Pictorial Article by Bob Hamilton
I made the first one of
these simply to be a crush proof mailing tube for a goblet I was sending to my
trading partner in the
Woodturner’s Resource
Challenge & Trade
Goblet
Challenge. I got very lucky when
turning my goblet and managed to complete one that was a significant
improvement on anything I had done previously, so I wanted to be sure it
arrived safely at its destination. When
I posted a picture of the completed box it seemed to generate some interest in
the process I used to make it.
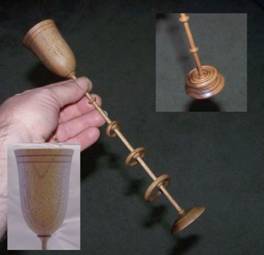
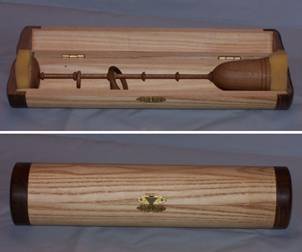
Photo 1: The original goblet Photo 2: The original case
I made the
original one in a bit of a hurry as a utility box with a specific purpose and
it did not occur to me to take any pictures of the process. Here I am attempting to re-create the
process in order to get step-by-step pictures.
I wound up making two boxes in order to get pictures of all the steps
and I am using the picture that best illustrates each step so you might notice
some switching back and forth between the two boxes.
The first step is to
decide on an internal diameter. It will
need to be slightly oversized in relation to the intended contents since the
process of ripping and jointing the cylinder after it is glued up will render
the interior shape slightly elliptical.
The original one was intended to house a goblet with a diameter of 1 ¾”
so I decided on 2” for the internal diameter.
I also decided that I would use 8 staves. The circumference of a 2” circle is just a hair over 6 ¼” so
dividing by 8 means that the narrow face of the staves would be about .78”, or
25/32”. In practice it is better to be
slightly under rather than over so I aimed for a finished width of ¾” on the
narrow face of the staves.
I started out by milling
some stock for the staves. I used 4/4
white ash because I had some on hand and I like the contrast between the ash
body and walnut end caps. I rough cut
a piece about 3 ½” wide and 48” long and then jointed and planed it straight
and square. I used my Veritas
Poly Gauge to set the tilt on my table saw and the tilt of my jointer fence
to the correct bevel angle (22.5°) for the staves.
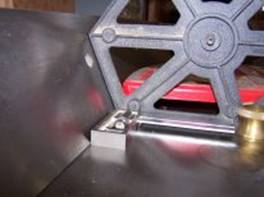
Photo 3: Using the Poly Gauge
I set the rip fence so
that the blade was tilted away from the fence.
I have a left tilting saw so the fence was on the right of the
blade. If you have a right tilting saw
you should move the fence to the left of the blade. I set the fence so that the bevel did not extend quite all the
way to the top face of the stock, leaving a slight flat of 1/16” or so rather
than a knife edge to the long point of the bevel. That let me rip both long edges of the piece without adjusting
the rip fence between cuts and the flat provides a better reference edge
against the rip fence than a feather edge would.

Photo 4: Flat on bevel
I then adjusted the rip
fence so the narrow face of the stave would be about 13/16” and made two more
cuts, swinging the piece end for end between cuts to give me two long
staves. Jointing the bevelled edges of
these two staves brought the width of the narrow face down to my intended
¾”.
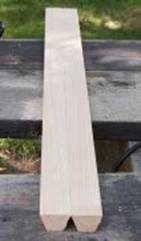
Photo 5: Stave stock
I then used my mitre saw
set up with a stop block to cut the two long staves into 8 equal length short
staves.
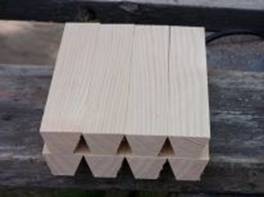
Photo 6: Staves cut